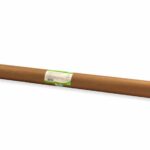
Tips for Installing Aluminum Foil Vapour Barrier in Saunas
1. Prepare the Walls and Ceiling
• Ensure that the insulation (e.g., mineral wool) has been installed between the studs in the walls and ceiling. The aluminum foil will go on top of this insulation.
• The surface should be clean and free from debris.
2. Measure and Cut the Foil
• Measure each section of the wall or ceiling to ensure the foil fits properly.
• Cut the aluminum foil to size, leaving an overlap of at least 50mm on all edges to create seams for sealing.
3. Attach the Foil
• Start at the top of the wall or ceiling.
• Use a staple gun to attach the aluminum foil to the studs. Place staples every 200–300mm along the edges to hold the foil securely.
• Avoid pulling the foil too tight; leave it slightly loose to account for any expansion caused by heat.
4. Seal the Seams
• Overlap the edges of each foil sheet by 50mm.
• Use foil tape to seal the seams completely. This prevents moisture from penetrating the vapour barrier.
5. Ensure an Air Gap
• For optimal performance, there should be an air gap of about 20mm between the aluminum foil and the inner wooden cladding. This can be achieved by attaching battens or furring strips over the foil before installing the cladding.
6. Inspect for Gaps
• Check the entire installation for any gaps or holes where moisture or heat could escape. Patch these areas with foil tape.
7. Install the Wooden Cladding
• Once the aluminum foil is securely in place, you can proceed to install timber cladding over the foil.


